Portrait Retouching Order That Saves Time
If your portrait retouching keeps turning into rework, the usual problem is not the tool, it is the order. A cleaner portrait retouching workflow in Photoshop starts with broad fixes, moves into skin and light, and saves sharpening for the very end.

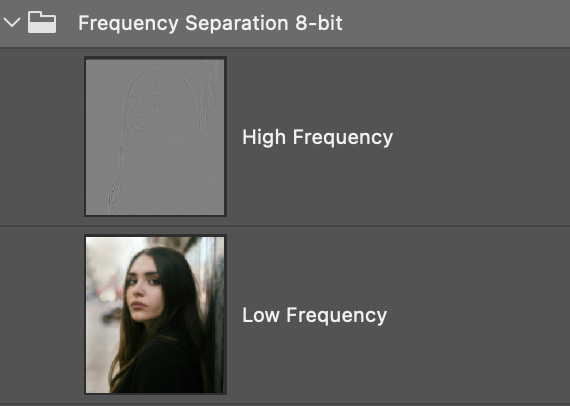
A portrait like this is easier to retouch well in Configurator Reloaded 2 when each step happens in the right order, instead of mixing cleanup, skin work, and sharpening too early.
Photo by Pablo Merchán Montes on Unsplash.
Start With Global Fixes and Basic Cleanup
Begin with exposure, white balance, and overall color. If the image is still too dark, too warm, or too flat, every local retouching decision you make will be based on the wrong version of the photo.
Once the base looks right, remove obvious distractions such as blemishes, dust, stray hairs, and temporary skin issues. Healing and cleanup belong early because they affect both color and texture, and you do not want those problems baked into later steps.
Use Frequency Separation in the Middle
After cleanup, frequency separation gives you a cleaner place to work on uneven color and skin texture separately. The low-frequency layer is where you smooth blotchy tone and color shifts. The high-frequency layer is where you protect or refine texture.
Configurator Reloaded 2 includes built-in Frequency Separation scripts that create the layer stack for you, which is useful when this step appears in almost every portrait session.
Frequency Separation in the plugin sets up the high and low layers quickly, so you can spend your time refining skin instead of rebuilding the same structure on every image.
Shape the Face With Dodge and Burn, Then Sharpen Last
Dodge and burn works best after the major skin cleanup is already done. At that point you are no longer fixing obvious distractions, you are shaping light and depth. Keep the brush flow low, build changes slowly, and concentrate on form instead of trying to erase texture.
Sharpening comes last for the same reason. You want to sharpen the portrait you are actually exporting, not an earlier version that still needs cleanup. Whether you use Smart Sharpen or High Pass Sharpening, mask the effect into eyes, hair, lashes, and clothing instead of applying the same strength across the whole face.
Why This Retouching Order Prevents Rework
This order works because each step prepares the next one. Global fixes give you correct tone, cleanup removes distractions, frequency separation handles skin tone and texture more cleanly, dodge and burn adds shape, and sharpening finishes the image instead of complicating it.
You can bend the sequence for your own style, but the principle stays the same: broad corrections first, detail work later. If you want the setup steps ready in one click, try Configurator Reloaded 2 and build a panel with the retouching scripts you use on every portrait.